Creating new users
PREREQUISITES
 Creating users in Manage can be performed by a system administrator using either the default Administrator role or a custom role with the necessary permissions.
 User Management Permissions
To effectively manage users and their associated product access in Manage, specific permissions must be assigned to your user role. These permissions ensure that you can perform all necessary actions related to user creation, modification, and configuration.
To do so, you need to use the default "Administrator" role or a custom role that includes the permissions below.
To do so, you need to use the default "Administrator" role or a custom role that includes the permissions below.
- AddUser, EditUser, ViewUsers, DeleteUser (user account permissions)
- ViewUserProductLinks, AddUserProductLink, EditUserProductLink, DeleteUserProductLink (product link permissions)
Company Domain Configuration
Before setting up user accounts, ensure your organization's domain is added in Manage. This step is vital for validating user email addresses and securing access so that only users with verified company domains can sign in.
To add a domain:
- Go to COMPANY SETTINGS > DOMAINS or Contact Auditdata Support to have it added for you.
Creating a User Account in Manage
New users can be added to the system from COMPANY SETTINGS accessible via the  icon located at the top right.
HOW IT WORKS:
- To add a user, go to the USERS tab and click +USER
- On the CREATE USER dialog, complete all the required fields (marked with *).
Login*
The login name must match the part of the user's email address that comes before the "@" symbol. For example, if the email is anna@m9usqaga.com, the login name should be anna. Upon SAVE, the login name cannot be changed.
The login name appears in the top right corner after the user signs in.Email*The email address must follow the formatlogin@companydomain.com. This email will serve as the user's login credential and must be used to access the system. - Click SAVE to add the user account to the system. After that, the account will appear in the user list but still requires configuration before it can be used.
Defining User Access and Permissions
To prepare the user account for use, you need to click on the user entry or hover over, click  and select EDIT.
When in EDIT MODE:
- Give the user access to Manage modules:
On the CONNECTED PRODUCTS tab, use the +CONNECT PRODUCT control to assign access. There are essentially two types of products you can connect:
a) MANAGE system's core functionalities
b) REPORTS (reporting and analytics tools).
NOTE: Each product you connect is associated with a specific client environment — usually representing a group of audiology clinics within a particular city or geographic area. When you assign a product to a user, you are also defining to which environment they will have access.
Within that environment, the user’s access is further limited to specific locations (i.e., individual clinics) that are linked to the connected product. As a result, connecting a product not only determines the client environment the user can work in, but also controls which clinics or locations within that environment they can access. - Assign locations to the user account:
To assign locations, navigate to the LOCATIONS tab. In the ENVIRONMENTS dropdown, you will see the list of environments automatically populated based on the products already connected to the user.
Select the appropriate client environment. Once selected, a list of all locations (clinics) associated with that environment will appear. From this list, choose the locations you want the user to have access to.
To grant the user access to all locations, use the "All locations" option available in the USER DETAILS tab. Once selected, the LOCATIONS tab will be disabled, as individual location assignments are no longer necessary. - Specify the user's capabilities in Manage through role-based permissions:
On the USER ROLES tab, assign a pre-configured role. Choose one of the two available default roles: Administrator or User or select any custom role. Assigning a role is essential, as it directly impacts the user’s ability to interact with various modules and perform tasks within the connected client environments and locations.
Once a role is assigned, the user account is fully configured and ready for use. The user will be able to log in and access the system according to the permissions defined by their role, the products connected to their account, and the locations assigned.
For more advanced user profile customization, refer to the next section.
Additional User Management Options
Once the user account has been configured with access, roles, and locations, you may need to manage additional aspects of the user’s profile. This includes updating personal information, configuring security settings, and linking the user to a specific audiology specialist for reporting and tracking purposes.
- Update personal information: Navigate to the USER DETAILS tab to update the user’s personal information. This includes fields such as name, phone number, and email address. You can also reset or change the user’s password from this tab if needed.
- Link the user to an audiology specialist: If the user should be associated with a specific audiology specialist, you can link them to an existing specialist profile in the system. This ensures that actions performed by the user are correctly attributed in the company’s records.
To do this, on the SPECIALISTS tab, select the appropriate specialist from the list of those already created in Manage. Configure security settings: For additional control over account security, go to the SECURITY tab.
On this tab, you can:
Force a password change on the user’s next login.Set the password to never expire, if required by your organization’s policy.
Temporarily lock the user account in case of a security concern or policy violation.
NOTE: Some security parameters, such as the number of reusable passwords, password expiration period, and lockout duration, are configured globally by Auditdata Support and cannot be modified here.First Time Login for the New User
Once the user account has been fully configured, including roles, permissions, connected products, and assigned locations, the user is ready to log in to the system for the first time.
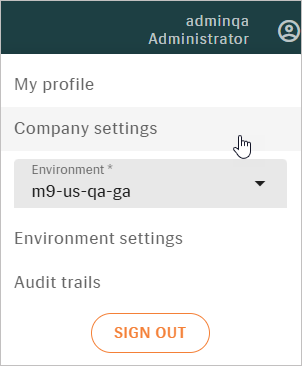
STEP 1: Initial Environment Selection
At first login, the user will be prompted to select a client environment. This selection defines the data and clinic locations they can access, usually grouped by city or region.
- The user will see a dropdown listing all available environments assigned to their account.
- They should select the appropriate environment from the list.
- After making a selection, they must click the SELECT button to confirm their choice.

This environment selection is part of the initial setup. Once confirmed, the system will remember the user’s choice and automatically apply it in future sessions.
STEP 2: Logging In
After selecting the environment, the user will be prompted to enter their login credentials, typically their email address and password. If a password reset or change was required during setup, the user will be guided through that process.
STEP 3: Navigating the Interface
Once logged in, the user will be directed to the main dashboard. The layout and available features will reflect the user’s assigned role and permissions:
- The Modules Menu on the left will display the main Manage modules available to the user and, if applicable, Reports.
- The User Menu at the top will provide access to profile information, and logout options.
- The Dashboard will show relevant data (e.g., tasks and/or appointments) based on the user’s role and the connected products.
Related Articles
New Product Import Information - including cost/list or device options updates
We would be happy to do this data import for you. This is a billable service at your current hourly rate. It takes approximately 1 to 2 hours depending upon the supplied data integrity but may take longer if we have to make corrections. The data is ...Public Release Notes - Bridge 2.2.0
About this release Release date: April, 2024 We are excited to introduce our update to Audidata Bridge, packed with new features and important bug fixes to enhance your experience. Features/Enhancements Patient export to an NHAX file. By exporting ...Error Message: "The S/N, Color, Side and BatteryType, Quantity, Price and Discounts cannot be changed for sale with Trials or Purchase Orders."
1. Problem Description Users may encounter an error when trying to add serial numbers from a previous patient sale. This issue typically occurs when the original patient sale is a duplicate transaction and the serial numbers were already removed from ...Public Release Notes - Manage 10.3.0
About this release October 2nd, 2024 Manage 10.3.0 This release brings a variety of new features and improvements aimed at streamlining operations, boosting efficiency, and enhancing patient care. Key feature highlights include: Fast and efficient ...Public Release Notes - Manage 10.2.0
About this release September 2nd, 2024 Manage 10.2.0 Welcome to the most recent update of our software - Manage 10.2.0! This latest version is brimming with new features that will simplify your workflow and enhance overall functionality. We have also ...