Patients/Leads
PATIENTS module helps you manage all patient-related information.
There are two record types in this module:
- Patient – full access to all features and workflows.
- Patient Lead – a preliminary record with limited functionality. Leads can be converted into full Patient records using the CONVERT TO PATIENT button in the top-right corner of the Lead’s screen.
Add a new patient/lead
To add a new record:
- Click +LEAD or +PATIENT in the top-right corner.
- Fill in all the required fields under the Personal info, Contact info and Additional contact sections. For patients, choose 3rd party payers if needed.
All mandatory fields are marked with an asterisk*. If you try to SAVE the patient before all mandatory fields are completed, a warning will appear, and missing fields will be marked in red.
The selection of mandatory fields can be configured from ENVIRONMENT SETTINGS > PATIENT SETTINGS > MANDATORY FIELDS.

Up to 3 addresses can be added per patient via the +ADDRESS button. One address can be marked as the BILLING ADDRESS. Invoices and quotes will be sent to the selected billing address.
Search for an existing record
Search by typing part of the patient's name, date of birth, patient ID, phone number, hearing aid serial number, preferred name, NHS number, HSP, Medicare number, or serial numbers of external devices.
Use the TYPE filter dropdown to view:
- All
- Leads only
- Patients only
Filter by ARCHIVE STATE to view:
- All
- Archived
- Non-archived
Archive or unarchive a patient
To archive a record, click ARCHIVE  on the SUMMARY tab. Archived records retain their summary but disable workflows, surveys, and Auditdata Bridge access.
To restore a record, use the same button.
Create a patient sale
The PATIENT SALE tab lists all quotes and invoices for the patient. Sales can be created as:
- Fast track sale
- Regular sale
To do so, click the corresponding control in the top right corner. All mandatory fields are marked with an asterisk (*).
NOTE: Users are able to create several invoices in one sale.
Fast track sale
For this type of sale, a linked appointment is not required. Having added a product to sell, click +INVOICE to create a sale. After that, you can use the option +PAYMENT to register a client payment or +CREDIT NOTE to return an item to stock/supplier if needed.
Regular sale
A regular sale requires a booked appointment. You can link it to the correct appointment by selecting it from the dropdown.

A list of PAYERS that appear on the PATIENT SALE tab is configured on the PERSONAL INFO tab under '3rd party payers'.
Private sale
A sale is considered private, if a client or a private insurance company is responsible for paying for products/services.
Having added a product to a sale, you can create a QUOTE or INVOICE using controls on the bottom. After an item is delivered, you can add a DELIVERY NOTE.
- If an invoice needs to be canceled (e.g., the invoice is incorrect, the client returned an item), create a CREDIT NOTE.
- If a sold item is not usable, add an EXCHANGE (for serialized items only) in order to replace an item.
Register a payment
Before a payment is registered in the system, the invoice amount is listed as OUTSTANDING.
To register a payment:
- Scroll down to the INVOICES section
- Select the invoice to be paid
- Hover over and click
- Choose PAYMENT
- On the ADD PAYMENT dialog, fill in the required fields. Click TOTAL AMOUNT to automatically add the amount from the invoice.
For Card payments, enter the last 4 digits in the Card Details field. These digits are securely stored for use in refund reconciliation. - Click ADD.
- The payment is now registered and the OUTSTANDING field has a 0 value.
[AU] HSP sale
A sale is considered an HSP sale, if one of the payers or the sole payer is HSP. To create an HSP sale for a patient, ensure HSP is listed among the PAYERS.
Important information:
- Discounts are disabled for HSP sales.
- A hearing aid cannot be sold without a fitting service in an HSP sale.
- With a hearing aid, you can sell only one fitting service and up to two non-fitting services.
- The HSP DETAILS section must be completed. Required fields are marked with an asterisk (*). Scroll down to locate these fields.
- The ‘Certification by client’ options must be checked; otherwise, a warning will be displayed.
Select Manual status if the HSP claim needs to be processed manually instead of following the automated flow. In this case, the claim letter will be excluded from the automatically exported batch and must be sent manually by a specialist.
Steps to finalize an HSP Sale:
- After completing all required details, click + INVOICE to activate the claim statuses.
- Click DRAFT to update the claim status to READY TO REVIEW or READY TO SEND (depending on the configuration in Environment Settings).
- Once the claim status is updated, you can create a DELIVERY NOTE or a CREDIT NOTE as needed.
[AU] Allocate commissions
After creating a sale, you can divide commission if two specialists were involved in a sale. NOTE: Commissions allocation cannot be changed after an invoice is created.
To split commission between two specialists:
- Go to the COMMISSIONS section and open it using the corresponding control
.
- Access EDIT mode via
.
- Add another specialist to the sale.
- Make sure that the combined commissions amount to 100%.
- SAVE.
[US] Create a claim
After completing a sale for a patient and assigning insurance, a claim can be generated directly from the sale record. Claims can generate a complete CMS-1500 form in PDF format to submit the claim manually or use Waystar integration to use automatic submission.
🔹 Steps to Create a Claim

Prerequisites:
- The patient must have at least one insurance payer assigned with correct details.
- The products sold must have correct CPT codes configured in the Product catalog.
- Navigate to the Patient sale tab.
- Go to the Patients module.
- Search and open the desired patient record.
- Go to the Sales tab.
- Click + SALE to create the sale.
- Choose the Appointment, Location, Specialist and a Price book.
- Choose relevant payers.
Note: If Medicate or Medicare is chosen, no other company can be added. - Add products (must have CPT code).
- Click + INVOICE.
- The Charge allocation button will appear in the Payers section.
- Create claim (+) button will appear for sales that meet the criteria in the Payers section.
- Fill in charges allocation.
- Click Create claim (+) to open the claim creation form.
- Fill in required claim details
- The system will auto-fill claim fields using:
- Patient and insurance info
- Sale items and associated CPT codes
- Clinic and provider NPI from environment settings
- Insert information on:
- ICD codes (based on diagnosis)
- Referring provider (if required)
- Other information
To ensure that your updates are securely saved and to prevent any loss of data, remember to click SAVE AND CONTINUE before switching tabs.
🔹 Steps to Submit a Claim
- Prepare the claim: Review the claim details thoroughly before proceeding.
- Set Claim Status: Click READY TO SUBMIT to update the claim's status to "Ready to Submit."
This will enable the SUBMIT CLAIM icon and the print & export options: - Print or Export PDF (CMS-1500 Form): This action generates a PDF version of the claim using the CMS-1500 form format, which can then be printed or exported as needed.
- Export 837 Form: This action generates an electronic version of the claim in the 837P format, making it compatible for submission to Waystar.
- Submit the Claim.
Click SUBMIT CLAIM and choose one of the following options: - Submit manually: Generate and print the CMS-1500 form for manual submission.
- Submit to Waystar: Submit the claim directly via Waystar.
Note: Submit to Waystar option is available if the Waystar integration is active in Environment settings. - Mark Payer's Feedback: You can check the status updates in Waystar and mark it in Manage:
- Click the APPROVE CLAIM icon to confirm the claim's acceptance.
- Click the REJECT CLAIM if the claim is declined or requires further review.
Additional Details for Automated Submission
- Processing time: Submitting a claim to Waystar may take up to one hour. During this time, the claim status will be marked as "In Progress".
- Confirmation: Once the claim is successfully submited, the status will change to “Submitted.”
- Status check: You can log in to your Waystar account to check the status of your claim at any time.
- Missing information: If any details are missing, they will be highlighted in red on the Waystar platform. In the event of errors, please review the data on the Waystar platform. You can then correct the mistakes and resubmit the claim directly from Waystar.
Manage patient devices
On the EQUIPMENT page, you can:
- View all linked hearing care devices and identify the active one.
- Update equipment records and access sale details.
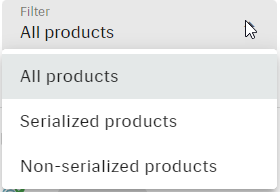
- Filter products by type (serialized, non-serialized, or all).
- Manage device status, warranties, and repair orders (including on-site repairs).
- [AU-specific] Monitor hearing instruments on trial.
- Add external devices to the patient equipment list.

Only those devices and accessories for which a delivery note has been created will appear on the EQUIPMENT PAGE.
By default, the page view displays SERIALIZED PRODUCTS. However, the filter can be adjusted to show either all products or non-serialized products only.
By clicking the options button  that appears on hover, you can access additional functionality:
[FOR CURRENT DEVICES]
- Unmark or mark the device as current
- Extend L&D warranty for the device
- Create repair order/Go to repair order
[FOR BOTH CURRENT AND PREVIOUSLY USED DEVICES]
- View stock details and transfer history
- View sale details
NOTE: The latest delivered hearing device is marked as 'current' by default. Batteries and other accessories can be marked manually.
[AU-specific] Monitor HI trials
Users in Australia can additionally oversee all active hearing instrument (HI) trials from the patient's EQUIPMENT tab. By monitoring these trials, hearing care providers can make informed decisions, ensuring that clients receive the best possible hearing solutions.
Add external devices
The +EQUIPMENT control enables you to add patient devices that were not sold by the company. This functionality ensures that records are complete and accurately represent all equipment used by the patient, regardless of the source of purchase.
On the "Add equipment" dialog, you can select any device from the product catalog and designate it as "Current".
- The battery and color selections are not limited to those found in the product catalog, but also include other active options available in the system (ENVIRONMENT SETTINGS > INVENTORY SETTINGS > PRODUCT COLORS).
- The type of device cannot be modified directly because it is automatically determined by the selection made in the "Product" field.
When reviewing the list of patient devices, you can hover over the device side icons (e.g.,  for the left ear) to see the tooltip that will indicate if it is an external device.
NOTE: Information about external devices is not stored in stock.
Manage documents
Specialists can add various documents to the Patient Card. These can be printable consent forms, device request forms, reminders, maintenance agreements, ear mold impressions, etc. All documents are stored within the DOCUMENTS tab.
Regular documents are added via the DOCUMENTS section. Patient letters (templates) are added using the +DOCUMENT control.
Add a patient letter
- Click +DOCUMENT.
- Select a letter template.
- Click CREATE.
- If the letter template is configurable, you will be able to PREVIEW and then SAVE the letter. In the PREVIEW mode, all dynamic fields in the template will be auto-completed with patient information. After a letter is saved, its contents cannot be edited.
- If the letter is a PDF template, the preview will be shown in the PDF reader. Letters that are PDF forms are auto-completed with patient information. Other PDF documents are shown exactly as they were originally uploaded in the system (via ENVIRONMENT SETTINGS > PRINT SETTINGS > PATIENT LETTERS).
All added documents are displayed in a list that can be sorted by name, category, document type or date.
Edit document details
To add a document tag, sensitivity label or description, hover over the selected line, click  > choose EDIT DETAILS.
Download and delete options
To download a document for viewing or remove a document, hover over the selected document, click > choose DOWNLOAD or DELETE respectively.
Filter documents
Users can apply various filters to narrow down the document search results based on the chosen criteria.
- To view available filters, click
.
- The filter icon will change if any filters are selected
.
NOTE:
Sensitive documents will only be shown to users that have the corresponding permission (View Patient Sensitive Document).
Sensitive documents will only be shown to users that have the corresponding permission (View Patient Sensitive Document).
Export documents
Patient data can be exported using the EXPORT button  when a patient is transferred to another provider. To select relevant documents, use the filtering option as described above.
The downloaded ZIP folder will be organized by document categories, with each category containing its respective documents in separate folders.
The downloaded ZIP folder will be organized by document categories, with each category containing its respective documents in separate folders.
THINGS TO CONSIDER:
- Document Categorization: Proper categorization of documents is crucial for efficient filtering and accurate export.
- Folder Structure: Document categories help build a proper folder structure in an exported ZIP archive, ensuring documents are sorted into separate folders once downloaded.
Each export action is recorded and can be viewed from AUDIT TRAILS > ACTION LOGS, alongside the date/time of export, the user who initiated the export, and the name of the patient whose data has been exported.
For more information on AUDIT TRAILS, go here.
Manage notification consents
The CONSENTS tab in the Patient/Lead record contains information about all active consents and their status for the chosen patient.
Consent is given separately for each specific communication method (SMS, phone call, email, mail). The status of consents can be changed at all times using the opt-in/opt-out switches. You can also change the contact method (phone or email) by selecting it from the dropdown list if there are several options to choose from.
There are two predefined consent groups:
- Appointment notifications
- Marketing notifications
To configure consents, go to ENVIRONMENT SETTINGS > PATIENT SETTINGS > CONSENTS. You can change consent or consent group text, set the expiration period and default state for the opt-in/opt-out options.
Review appointments
APPOINTMENTS tab displays all past and future appointments linked to a particular patient, including those canceled for various reasons.
NOTE: Today's appointments and later appointments are listed in the FUTURE APPOINTMENTS section.
To access the APPOINTMENT SUMMARY screen, click on the selected appointment. Customize the page by clicking the Page settings icon  , where you can select the data to display and arrange sections according to your preferences.
Within the Appointment Details section, specialists can review appointment outcomes to better understand the patient's current status and provide collaborative care.
Generate appointment reports
For past appointments, you can generate a report by clicking + REPORT. The report will be created using the active report template, which can be configured in ENVIRONMENT SETTINGS. See more on Appointment Report Templates.
Data from the appointment automatically fills in the report fields.
Generated reports are saved with the DRAFT status in the patient’s Documents section of the APPOINTMENT DETAILS page.
Manage referrals
The Referrals tab in the Patients module enables HCPs to efficiently manage patient referrals, ensuring smooth communication and collaboration with external specialists or providers.
Medical referrals
A Medical referral is a request to provide services to a patient’s GP or another third party.
- Click + MEDICAL REFERRAL in bottom-right corner.
- Fill in all mandatory fields marked with an asterisk*.
- Save the referral.
[UK] Inbound referrals
Inbound referrals are requests from a patient’s GP to provide specific services.
A valid NHS number must be added to the patient’s profile.
- Click + INBOUND REFERRAL in bottom-right corner.
- Select referral type from the options:
- Self-referral: Patient has a referral from a GP in a paper form.
- Letter: Referral was sent via email.
- Transfer: Patient has been transferred from another GP practice.
- Fill in the referral details. All mandatory fields are marked with an asterisk*.
- Click SAVE to confirm the details.
Inbound referral statuses
- Open: Default status for newly created referrals.
- Cancel: Requires cancellation reason and GP letter code.
- Discharge: Enter discharge reason and GP letter code.
- Aftercare: Available if linked appointments or invoices exist. Status can be changed back to Open, Discharge or Close.
- On hold: Status can be updated back to Open or Discharge.
[AU] Medicare referrals
Medicare referrals are used when Medicare acts as a third-party payer for the patient’s care. These referrals ensure services are billed appropriately.
The patient must have Medicare added as a third-party payer in their Personal Info section.
Only one active Medicare referral is allowed per patient.
[AU] Workcover referrals
Workover referrals are used for patients covered by WorkCover insurance. These referrals facilitate appropriate billing and documentation of workplace-related care.
The patient must have Workcover added as a third-party payer in their Personal Info section.
Manage patient surveys
Survey templates can be found and configured in the USER MENU > ENVIRONMENT SETTINGS > SURVEYS.
Only published surveys can be used in the Patient and Scheduler modules.
Add / access a survey
There are several ways to add a survey to a Patient:
- Navigate to the PATIENT module > SUMMARY tab. Click
, then +SURVEY. Choose the survey you want to add by clicking on it. If you have a WORKFLOW started in the Patient module, you can select and add a survey in that Workflow.
- Open SCHEDULER. Click a Patient's appointment. On the appointment preview, hover over the patient's name. On hover, click the options button
on the right. Click SURVEYS and then +SURVEY. Choose the survey you want to add by clicking on it.
On the Survey pop-up window:
- You can than COMPLETE the whole survey or part of the survey and SAVE it for later editing. If you CANCEL out, the survey will still be added to the Patient with the status CREATED.
- Surveys added to or completed for a patient are synchronized throughout the system. So, if a survey is completed in the Patient module, this survey will be accessible from the Scheduler module as well.
View, edit or delete surveys
All added surveys will be displayed in a list. Each survey has a STATUS that determines if a survey was just created, completed or is in progress. Hover over a survey to see the OPTIONS button . Choose from the respective options to view, edit or delete the survey.
- In VIEW mode, you can export a survey to PDF. To do so, use the control
in the top right corner.
- In EDIT mode, you can modify the survey responses as needed.
Surveys older than 24 hours cannot be edited. However, you can create a new version with all the original data for necessary modifications.
Filter surveys and view latest surveys
When managing long lists of surveys, you can use the search bar to quickly find the required survey. You can also filter patient surveys by status and opt to view only the latest survey versions.
- The latest patient surveys are shown by default. To view all surveys, clear the corresponding checkbox.
- Surveys created based on the existing ones will reference the original survey.
Run patient workflows
The WORKFLOWS panel, located on the right-hand side, provides information on various tasks linked to specific appointment(s) associated with the selected patient.
Within the Workflows, you'll find steps that must be completed during the appointment. This panel remains visible when switching to other tabs within the PATIENT module.
To start a workflow:
- Click
- Select a Workflow and appointment
- ADD
To stop a workflow:
- Click
- Provide a reason in the text field (optional)
- STOP
If you want to create an invoice for this appointment, choose CREATE INVOICE and click CREATE AND STOP. The system will open a CREATE PATIENT SALE screen with pre-filled appointment and location information.
For more information on Patient Management, see our E-learning course
Create tasks for personalized care
You can create, view, and manage relevant tasks directly within the Tasks tab on the Patient and Lead profiles.
HOW IT WORKS
To create a task:
- Open a Patient or Lead profile.
- Go to the Tasks tab.
- Click + TASK to open the Create Task window.
- Fill in task details following the standard task creation flow.
- Save the task to link it to the patient or lead.
Tasks you create will appear both in the individual patient's/leads profile and in the TASKS module, where they are listed alongside tasks linked to other patients and leads.
While the Patient or Lead profile is ideal for managing tasks related to a specific patient or lead, the TASKS module gives you a broader view — allowing you to prioritize, track, and manage all your tasks across patients, locations, and statuses in one centralized workspace.
- To understand how to set up task statuses, categories, and control task visibility by location, visit the Task Management section.
- For step-by-step instructions on creating and managing tasks from the TASKS module, see the Tasks section.
Visual indicators:
- A warning icon appears next to the Tasks tab if any Tasks for the selected Patient/Lead are overdue or due today.
Task filtering:
- Tasks in the tab can be filtered by status and by assigned user.
It is required to have the appropriate task management permissions to manage tasks: "Create Manual Task", "Edit Manual Task", "Delete Manual Task", "View Manual Task".
Related Articles
Listo/Engage leads not showing in Manage
Listo/Engage leads not showing in Manage If leads created in Listo/Engage appear in your Auditdata Cloud reports but do not show under Manage → Lead, this is usually because too many fields are set as mandatory for patient leads in Manage. For ...Leads
The LEADS page allows you to review and manage all added leads in one place. By utilizing available functionality, you can: Quickly retrieve key lead information to enhance lead tracking and sales strategies. Use search parameters, filters and ...How to Archive and Restore Patients
This video shows how to archive patients in Auditdata Manage. Press "CC" to turn on subtitles.Lead and Patient Management
Welcome to the online learning module dedicated to the Patient Management Module within Manage. In this module, you'll develop a thorough understanding of: Create, access and convert leads into patients Understand which actions require lead ...Optimizing Specialist Allocation in Auditdata Manage
The Advanced Provider Allocation feature offers smart, automated scheduling by assessing clinicians' availability. Taking into account elements like the length and urgency of appointments, it optimizes allocation for maximum efficiency. Consequently, ...